Making a Blogdown Website Like This
In the previous post, I went into great length on how I settled on using Blogdown for this website. In this post, I will explain how to set up the development environment, dependencies, testing, continuous delivery, and uploading. There are many ways to do this and these are the steps that I took. Feel free to add other ways in the comment section below.
This post is not meant to be a comprehensive guide of creating a website using blogdown but a documentation of my process. Most of the information could be found in the blogdown book. I also found this medium post to have a similar workflow while I was writing this post.
Prerequisite and Setup
- Setup Git and Github account
- Install
RandR-Studioif not installed already. Installation instruction from RStudioAdvanced users can install both these tools using package managers in OS of their choice, eg:
aptfor linux (ubuntu)homebrewfor macchocolateyfor windows
-
Using R-studio, install the packages
blogdownandhugoinstall.packages('blogdown')
blogdown::install_hugo()# could be skipped here and installed while setting up the project -
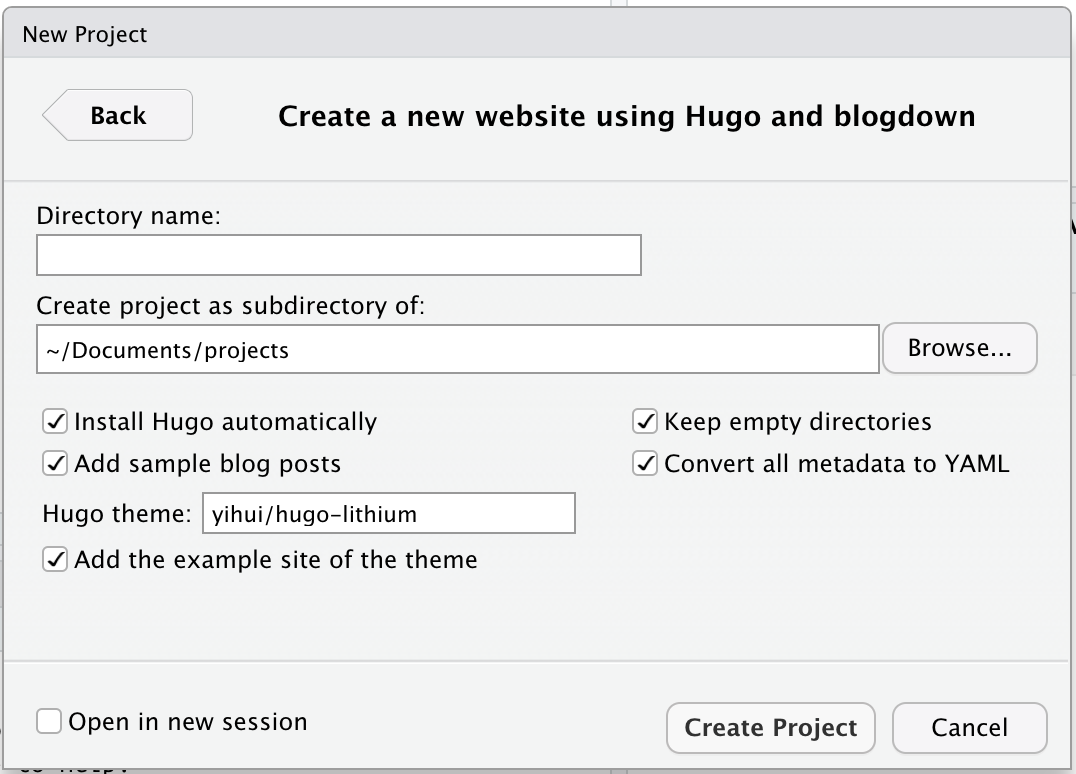
Create a new project:
- Choose
New Directory - Choose
Website using blogdown - Directory Name -> “Whatever you like”
Note: It might be easiest to keep all the boxes checked - Check if you do not have
Hugoinstalled already (or if you do not know what that is) - Check
Convert all metadata to YAMLand leave all other boxes unchecked - Hugo theme can be chosen from https://themes.gohugo.io/ but for now keep the default theme on. (The theme on my site is coder)
- Click
Create Project. The website is ready!!
- Choose
-
The setup is complete. Check the
Viewerpanel on R-Studio (or go to localhost:4321 on the browser)
Starting with Blogdown
If the boxes that asked to keep empty folders/demo site/example posts weren’t checked, the new site might be empty, but it is not a problem since we can start working on it now.
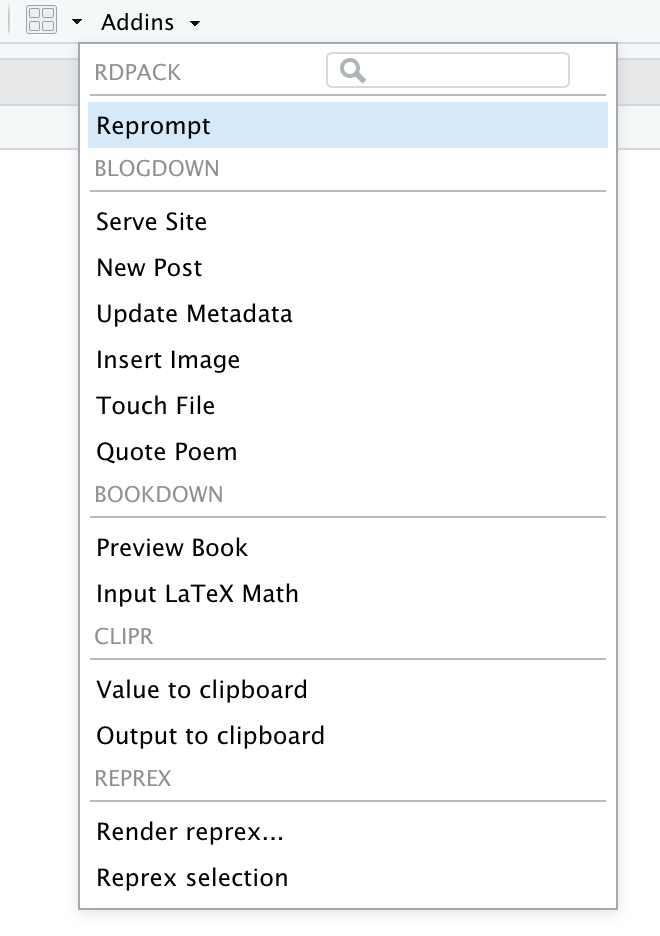
Towards the top of the R-Studio screen there is a little drop down Addins where there is a section for blogdown. Since the site is already served, there is no need to click Serve Site again.
Creating pages, blogs, etc
Most basic operations can be performed using the Addins dropdown. To add a new post, click on the New Post and fill in the information as you like. The post can be written in Markdown or R Markdown. As soon as the Done button is clicked, the new post will be seen on the new website. Now we can write a post and as soon as we save the file, the content will be available on the website.
Customizing the site
All the customization is done using the config.toml file. To use a new theme visit https://themes.gohugo.io. Usually each theme page has documentation on how the theme can be configured. I am choosing to use Coder. Change the theme variable on config.toml with theme="hugo-coder". To use a different theme, install the theme using the R console blogdown::install_theme(<theme-name>), then update the config.toml file. Not all configuration from the previous theme may work.
Not all hugo themes might be supported on blogdown so it is highly recommended that users do some research/poking around. There are lots of customization such as adding google analytics id, disqus id, linking social media, etc. that can be done here. This step is where we will probably spend a lot of time while learning the workings of blogdown.
Using GitHub (or other VCS to store the code)
Git can be used to track the changes and jump between different versions of config.toml and different branches where different posts can be developed. Using an online git service such as Github not only works as a repository storage, but also a great place from which to deploy the website. In addition, R-Studio also works as a great git GUI and the configuration is straight forward. Some configuration will be required and using .gitignore file is highly recommended. Here is a great resource to set up git with R-Studio
Anyway, once the the site is ready for the world to see, we can push the project to github repository. There are a couple of ways to deploy the site to the World Wide Web that I prefer i.e. Github Pages, and Netfliy. Both ways will provide ways to continuously make updates to the site and deploy, achieving CI/CD. This process will include pushing changes to GitHub, and GitHub will check for changes and run any tests that is required and within a few minutes, the changes are live.
Deploying our site using Netlify
As I mentioned earlier, that I like using Netlify and GitHub Pages for deploying the website. The biggest advantage for both of these is the fact that I can get started for free. Sign up for Netlify and after configuring the profile we are ready to deploy our site.
- Login to Netlify
- Click
new site from Git - Choose
GitHub(or other git hosts if using a different provider) - If Netlify has permission to the repositories, it will list them here. If not, configure it by clicking the link that says “Configure the Netlify app on Github”.
- It will authenticate again with github and opens Github Netlify app page. On the Repository access section, click
only select repositoryand choose the repository that has blogdown site and save. - Back on Netlify page, the repository should show up. Select that.
- Check to make sure the repository and the branch selected are correct and have
hugoandpublicon those fields (Netlify will run hugo in the background and create the files required for the static site in thepublicfolder in Netlify Servers). ClickDeploy Siteand site built will start. - On the next page, we can see the progress of site deployment. The site will get a strange looking name and the site will have the domain that looks like
https://<weird-name>.netlify.app. It will show whether the site was published or failed - Next, set up a custom domain or at least change the
<weird-name>to name of our choosing. A custom domain needs to be purchased from a DNS registrar such as https://godaddy.com or https://namecheap.com. You may want your own domain eventually, but initially it is okay to use the free subdomain onnetlify.app. Click on Site Setting >Generaland clickChange Site Name - Now the blogdown site is up and running.
Adding new posts on the website
Once the website is live, and we want to update the site very frequently. Say, on our site, we want to add a new post. With blogdown, github and netlify, this is very easy. First we need to make sure that the repository on github and on our local computer is the same. We can follow following steps/git workflow:
- Open R-Studio, and then open the previously created project.
- Click on the
Gitpanel, and click the down arrow akapull. - Click on
AddonsandServe SitethenNew Postand create the new post. - Once the file is saved, the new post is visible on the
viewerpanel on R-Studio. - We need to
pushthe new changes to GitHub. On theGitpanel, “select”” all the files, then clickcommit. Write a short informative message on the new window e.g. “Added new post” and close that window to return to main R-Studio window. - Click the up arrow to
pushthe changes. If the push is successful, the new post file will be available on GitHub which Netlify will immediately notice and will build the site.
That is it! If you are following this post and trying to build the website, it is more likely than not that you’ll get errors. As always, if there is specific question or issues, please feel free to ask by leaving comments below or tweet to @parashupreti.